

By J.B. Lester
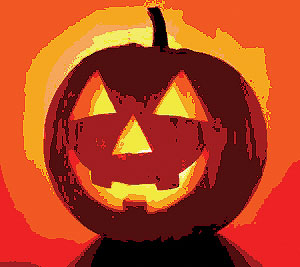
There is nothing more iconic than a Jack-O-Lantern on Halloween. The carving event with the little ones watching and waiting in anticipation as the lid slowly comes off the pumpkin and “SCREAM”, the witch comes flying out. Or at least that was the tradition at our house growing up and so it was for my kids, too. A frightful beginning to a traditionally scary, yet fun-loving All Hallows Eve.
History tell us that pumpkins were not the first items carved for Halloween. A few hundred years ago in Ireland and Scotland, they hollowed-out turnips and put hot embers or candles inside on All Hallows Eve (Halloween). These lighted pumpkins with scary carved faces (Jack-O-Lanterns) were used both to ward off bad spirits and to help torch the way of those roaming about on Halloween night. Irish immigrants to the U.S. brought this tradition with them and instead of turnips, they hollowed out pumpkins which were much more plentiful in the New World. The wearing of costumes seems to have come from American farmers and their children celebrating the harvest sometime after the American Revolution. This fall holiday called Autumn Play Party eventually merged with the more religious holiday of All Hallows Eve, All Saints Day and All Souls Day and became a more community-oriented and less religious holiday known as Halloween. Trick or treating is based on the idea that if you offer someone a treat, they will not play a trick on you. We are not sure how that morphed into kids telling knock-knock jokes for candy bars. But I suppose the candy companies had something to do with it, so the trick is on all of us.
Literally hundreds of thousands of pumpkins are harvested and sold each year around Halloween. Landfills become inundated with spent Jack-O-Lanterns and rotted pumpkins. What else can we do with our old pumpkins? Here are a few ideas according to pumpkinpatchesandmore.org.
If you have already carved your pumpkins you can:
- Put it in the compost heap – it will make good fertilizer.
- Bury it in the garden – it will decay quickly and enrich the soil. Remember to take the candle or light out before burying. I have had pumpkin plants return from buried seeds if the winter is not too harsh.
- Wash, dry and save the seeds to plant next year (they will grow!)
- Wash and roast the seeds – they make good snacks.
Here are some things not to do with your pumpkin after it’s carved.
- Use it as a door stop.
- Keep it indoors: it will rot and stain the floor.
- Put it in the attic for next Halloween.
- Attempt to eat it or cook with it.
Here are some things you can do with your pumpkin if you did not carve it into a
Jack-O-Lantern. Pumpkins are rich in vitamin A, C and potassium. So cooking your pumpkin after Halloween is a great idea (so long as you have not already carved it.) Everyone’s favorite pumpkin pie can be made from scratch from the fleshy part of the pumpkin after Halloween so long as your pumpkin has not turned rotten. For a great recipe and all the directions you will need to get started please visit http://www.pickyourown.org/pumpkinpie.php.
You can also roast the pumpkin seeds which our family has done to the delight of everyone.
- Cut open the pumpkin by cutting a circle around the stem end with a sharp knife (knife blade angled in), and pulling off the top. Use a strong metal spoon to scrape the insides of the pumpkin and scoop out the seeds and strings. Place the glob of pumpkin seeds in a colander and rinse with water to separate the seeds from the other innards.
- Measure the pumpkin seeds in a measuring cup. Place the seeds in a medium saucepan. Add 2 cups of water and 1 tablespoon of salt to the pan for every half cup of pumpkin seeds. Salt to taste. Bring the salted water and pumpkin seeds to a boil. Let simmer for 10 minutes. Remove from heat and drain.
- Preheat the oven to 400°F. Coat the bottom of a roasting pan or baking sheet with olive oil, about a teaspoon or so. Spread the seeds out over the roasting pan in a single layer, and toss them a bit to coat them with the oil on the pan. Bake on the top rack until the seeds begin to brown, 5-20 minutes, depending on the size of the seeds. Small pumpkin seeds may toast in about 5 minutes or so, large pumpkin seeds may take up to 20 minutes. Keep an eye on the pumpkin seeds so they don’t get over toasted. We did that once and the smoke alarm went off. When lightly browned, remove the pan from the oven and let cool on a rack. Let the pumpkin seeds cool down before eating.
Either crack to remove the inner seed or eat whole. Our family likes them whole.
For more info, visit www.SimplyRecipes.com or http://www.pickyourown.org/pumpkinpie.php.
Enjoy your pumpkins and have a happy, healthy and safe Halloween.